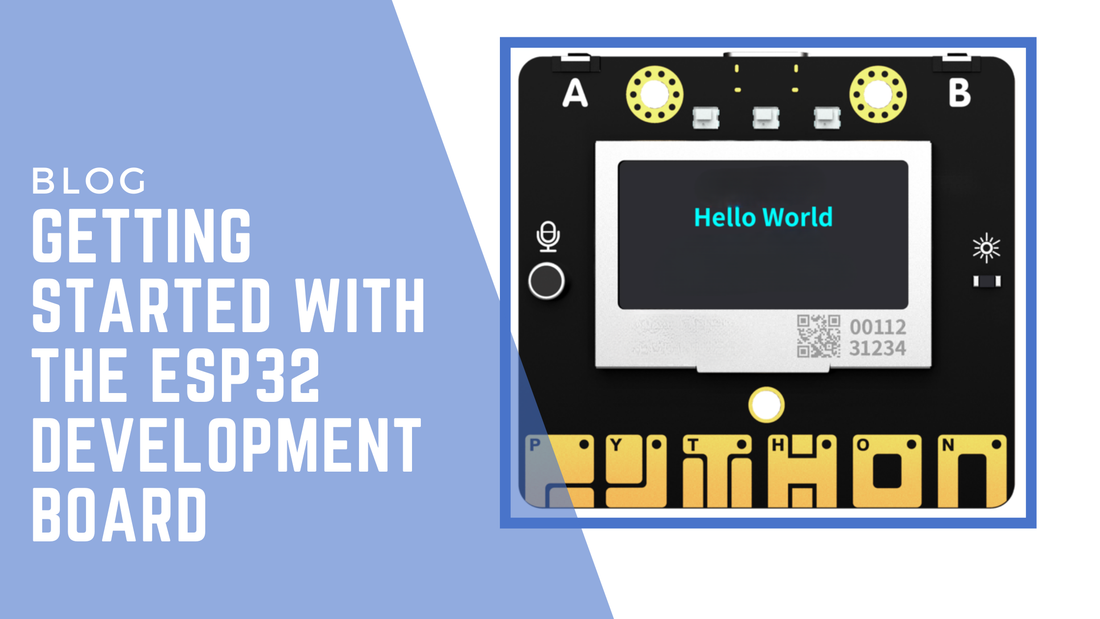
Getting Started with the ESP32 Development Board
The ESP32 is a powerful and versatile microcontroller, perfect for beginners and advanced users alike. Whether you're interested in IoT, robotics, or game design, the ESP32 can do it all. In this blog, we’ll walk you through how to get started with ESP32 using Thonny IDE, Arduino IDE, and mPython Software, focusing on a simple project that displays “Hello, World” on an OLED screen.
We'll cover the basics of each development environment and show you how to write and display text on an OLED screen connected to the mpythonboard.
Setting Up Your ESP32 Development Environment
Before you start coding, you need to set up a development environment for your ESP32. Here’s a quick introduction to three popular tools: Thonny, Arduino IDE, and mPython Software.
1. Thonny (MicroPython IDE)
Thonny is a beginner-friendly Python IDE that works well with MicroPython on the ESP32. It’s lightweight and perfect for quick development.
To use Thonny with your ESP32:
- Download Thonny from Thonny.org.
- Install MicroPython on your ESP32 by flashing the MicroPython firmware.
- Connect your ESP32 to your computer via USB, and select your ESP32 board in the Tools > Interpreter section in Thonny.
2. Arduino IDE
Arduino IDE is one of the most popular platforms for ESP32 development. It supports both C++ and Arduino libraries, making it ideal for projects that require lower-level control.
To use Arduino IDE with ESP32:
- Download the Arduino IDE from Arduino.cc.
- Install the ESP32 board package by adding this URL to Preferences:
https://dl.espressif.com/dl/package_esp32_index.json. - Select your ESP32 board in Tools > Board > labplus mpython
3. mPython Software
The mPython Software is specifically designed for mPythonBoard (a variant of ESP32 designed for education). It supports both block-based programming and MicroPython, making it great for STEM education.
To use mPython:
- Download the mPython Software from the official mPython website.
- Follow the instructions to flash mPython firmware onto your ESP32 board.
- Open the mPython IDE and start coding!
Displaying "Hello, World" on OLED Screen
Let’s get started with a simple project—displaying "Hello, World" on an OLED screen on the mpythonboard. The OLED screen is a great way to visualise data and interact with your mpythonboard projects.
Now, let’s dive into the code.
Using Thonny to Display "Hello, World" on OLED
Open Thonny, and make sure you have MicroPython installed on your ESP32. Here’s how you can display text on the OLED using MicroPython:
- Install the
ssd1306library for OLED control by uploading it to your ESP32. - Write the following code to display “Hello, World” at specific coordinates on the screen.
[insert image]
In this script:
- We initialize the I2C connection to communicate with the OLED display.
- The
oled.text()function displays the text at (32, 16), which specifies the x and y coordinates on the OLED. - The
oled.show()command sends the text to the display.
Using Arduino IDE to Display "Hello, World" on OLED
If you prefer to use Arduino IDE, here’s the code to display "Hello, World" using the same OLED display:
[insert image]
This Arduino code does the same thing as the MicroPython code but in C++. It initializes the OLED display, clears it, sets the text size and position, and then displays "Hello, World!".
Using mPython Software to Display "Hello, World"
The mPython Software offers a simple way to display text on the OLED using block-based coding or MicroPython. Here’s how to do it using MicroPython:
- The
DispChar(str, x, y)function writes the string str at the coordinates (x, y) on the OLED display. Theoled.show()command sends the buffer to the OLED to refresh the display.
This example demonstrates the ease of using mPython to create fun and interactive displays for projects.
Adjusting Brightness
To adjust the brightness of the display, you can modify the OLED's brightness values using a range of 0 to 255. For example:
[insert image]
You can dynamically change the brightness during the program, adding another layer of interaction to your projects.
Conclusion: Getting Started with ESP32 is Easy!
Displaying “Hello, World” on an OLED screen using Thonny, Arduino IDE, or mPython Software is a great way to get started with the ESP32. Each platform has its own strengths, making the ESP32 accessible to beginners and advanced users alike.
By learning how to display text on an OLED, you’ve taken the first step towards building more complex projects like data displays, interactive games, or even IoT dashboards. The ESP32 based mpythonboard, paired with these development environments, is a powerful tool for educators and students
Ready to dive deeper into mpythonboard projects? Check out more blogs and tutorials to explore the endless possibilities of this versatile microcontroller.